The Exposure Triangle
 The Exposure Triangle
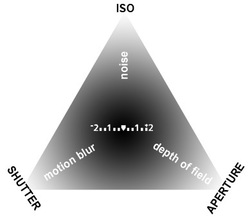
Exposure is the total amount of light that strikes the film or sensor. There are 3 features cameras have that will ultimately affect how the sensor records the exposure by allowing the photographer to adjust the amount of light coming into the camera. We call this, the Exposure Triangle. Do you know what the 3 are? If you said, shutter speed, aperture, and ISO speed, you would be correct!
Adjusting these 3 elements will determine whether your image has a normal, over or under exposure. Your camera meter’s job is to measure the amount of light and then calculate a shutter and aperture combination to create a “normal” exposure for that scene. I use the word “normal” because it tries to create an average, tone of 18% middle gray to reproduce the tones in your scene. All camera meters need to be calibrated to a standard way of measuring light that will for the most part work for all types of scenes and render a usable exposure in a variety of lighting situations. This is why they are all calibrated at the average, 18 % middle gray. The problem with a camera being calibrated to 18% middle gray is that your scene or the lighting might not have an average amount of tones or light. The camera does its best in automatic or program mode, but often falls short in these situations. So in a scene with a greater amount of light or a lesser amount of light, the “normal” exposure that it calculated, will result in an image that is over or under exposed. So, what can we do about this? Well, this is why cameras have manual mode. It allows a photographer who understands the principles of exposure to be able to override the camera's meter, compensate for different light levels, and get an appropriate exposure for the lighting and tones in the scene.
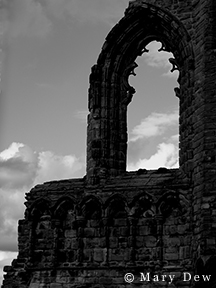
“Normal” exposure (full range of tones and details), or is underexposed (not enough light that results in a darker image) or overexposed (too much light that results in a lighter image). Generally speaking, we want a full tonal range print, with bright whites that maintains details, rich blacks that also maintain details, and many shades of gray. The exposure determines the overall brightness of the image file or the density of a negative. There are times, however, when we might not want a full tonal range and may want to print the image a little darker or lighter. This is called creative license, but it should be appropriate for the subject/scene and be intentional (serve a purpose) not just due to poor exposure.
Can you identify which one is normal, over and under exposed? Hover over the images to see the amount of exposure. Click on the image to make it larger.
Adjusting these 3 elements will determine whether your image has a normal, over or under exposure. Your camera meter’s job is to measure the amount of light and then calculate a shutter and aperture combination to create a “normal” exposure for that scene. I use the word “normal” because it tries to create an average, tone of 18% middle gray to reproduce the tones in your scene. All camera meters need to be calibrated to a standard way of measuring light that will for the most part work for all types of scenes and render a usable exposure in a variety of lighting situations. This is why they are all calibrated at the average, 18 % middle gray. The problem with a camera being calibrated to 18% middle gray is that your scene or the lighting might not have an average amount of tones or light. The camera does its best in automatic or program mode, but often falls short in these situations. So in a scene with a greater amount of light or a lesser amount of light, the “normal” exposure that it calculated, will result in an image that is over or under exposed. So, what can we do about this? Well, this is why cameras have manual mode. It allows a photographer who understands the principles of exposure to be able to override the camera's meter, compensate for different light levels, and get an appropriate exposure for the lighting and tones in the scene.
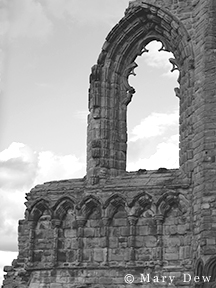
“Normal” exposure (full range of tones and details), or is underexposed (not enough light that results in a darker image) or overexposed (too much light that results in a lighter image). Generally speaking, we want a full tonal range print, with bright whites that maintains details, rich blacks that also maintain details, and many shades of gray. The exposure determines the overall brightness of the image file or the density of a negative. There are times, however, when we might not want a full tonal range and may want to print the image a little darker or lighter. This is called creative license, but it should be appropriate for the subject/scene and be intentional (serve a purpose) not just due to poor exposure.
Can you identify which one is normal, over and under exposed? Hover over the images to see the amount of exposure. Click on the image to make it larger.

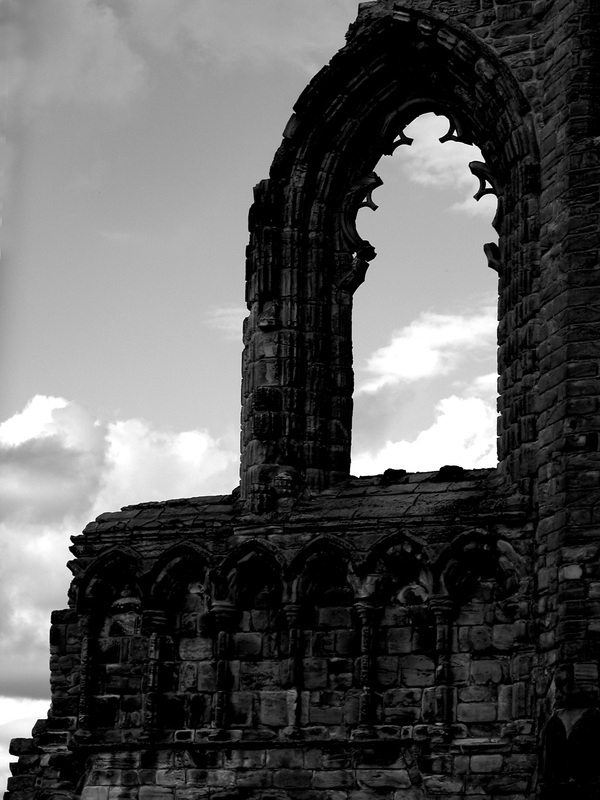
Contrast is another important term for you to know when we are discussing the tonal range in an image. Contrast- is the difference between the light and dark parts of the image/print. A high contrast image has extremely dark blacks, very bright whites with little to no detail, and a very small range of grays or mid tones. A low contrast image (also called a flat image) is when we have an image that has no pure black, no pure white, and the majority of the image is made up of grays or mid tones. Subject Contrast- the difference between the amount of the darker and lighter tones in the scene. It is affected by the lighting and type of day. A high contrast scene (extremely sunny) will result in a high contrast image. This is an image with extremely dark blacks, very bright whites with little to no detail, and a very small range of grays or mid tones. A low contrast scene (also called a flat image) is when we have a scene that is very gray. An example would be of a low contrast scene occurs on very overcast or foggy types of days. Again, generally we want a normal contrast range so that we have lots of details all the tones, but using that creative license is important to remember, as long as it fits what you are shooting. In other words, it needs to be intentional and fit with the subject you are photographing, not as an excuse for a poor contrast range due to printing or editing.
Can you identify which one is normal, high and low contrast? Hover over the images to see the level of contrast. Click on the image to make it larger.
Can you identify which one is normal, high and low contrast? Hover over the images to see the level of contrast. Click on the image to make it larger.

The Double-Half Rule
The Double-Half Rule states that as you adjust your shutter, aperture or ISO (any of the factors on the Exposure Triangle) by a one whole stop increment, you are either doubling or halving the amount of light. Therefore, shutters, apertures and ISOs work in a 1:2 or 2:1 ratio. For example, if you adjust your shutter speed from 1/60 of a second to a faster speed of 1/125 of a second, you are letting in half the amount of light, which will result in an image that is twice as dark. It also works in the same manner when I move in the opposite direction. If you adjust the shutter from 1/60 of a second to a slower speed of 1/30 of a second, you are letting in twice as much light, which will result in an image that is one stop lighter. When you shoot 1 normal exposure, and then 1 under exposure and 1 over exposure, this process is known as bracketing. It is a good idea to try and get in the habit of bracketing your exposures to make sure that you end up with at least one exposure that gives you the most amount of tones possible. Test out the Double-Half Rule with this Simulated Camera (below) and watch what happens to the exposure of the image when you adjust the shutter speed in one-stop increments.

